Thursday, September 19, 2013

Installing the Subfloor

I have decided to install the subfloor and insulate simultaneously. I found that the loose foam scrapes are very light and easily blown around by the wind. So I am installing a couple panels of the subfloor, then stuffing in the loose foam insulation, then sealing up the remainder of the subfloor.

It was a very exciting moment when I finished screwing in the first subfloor panel. I was alone in the field working by myself and I let out a huge hoot and did a little happy dance on my new little 4'x8' subfloor. On the other side of the 28 acre parcel I heard a reply hoot, I think it was from Kevin and Allie, which made me smile. Neighbors through the woods, what a wonderful thing!

I am finding that this tiny house is just barely workable for my one woman show. The 3/4" plywood panels that I am installing as sub-floor are pretty heavy. I am extremely fortunate that I started lifting some free weights a few weeks ago in an attempt to get into shape for my TH build. I can definitely tell that had I not been strength training I would not be able to maneuver some of the TH lumber and plywood alone without injuring myself.

Going solo on the TH build has lead me to discover that I need to be creative. When I was installing the first few panels of subfloor I found that they were 'floating' a bit after sinking the first couple screws. Subfloor moving over even 1/4" during install can have a cascading affect that can render you up a creek on the last couple panels. So here is a trick I devised... in order to keep plywood in place take a couple nails and sink them near the corners pinching the panel tightly. It worked like a charm! In these pictures you can see both my nail pinch trick and some of the recycled spray foam insulation I am using for the TH floor.

Another trick that I discovered is pre-drilling the holes for the screws. I ended up stripping a couple screw bits prior to coming up with this splendid idea! You just need to make sure that the drill bit is one of two sizes smaller in diameter than your screws.

I am also getting creative at finding cheap labor. My daughter had some girlfriends over so I started talking up the zip line that reaches across the swimming hole. Of course the teens jumped at the chance to go out to the farm "while I worked." In between their exploring walks I got them to help stuff foam by pushing it in the floor cavities with their legs while sitting. They saved me at least an hour of work. Thank you Ellie, Maddie and Alista for all of your help!  :-)

Well my hard day of work paid off. My supervisor (Buddy my dog) was pleased with my progress. I was able to insulate and secure 4 of the 7.5 subfloor panels. I also buttoned up the site with a large 3 mil plastic sheet to keep out any rain this week. As Buddy and I were leaving I noticed the beautiful sunset and just had to take a picture to share a little piece of my new home with all of you :-)


Insulating the Floor

Now that the wall panels are on-site I need to insulate my floor joists prior to installing the subfloor.

For my TH floor insulation I am using recycled spray foam. I obtained cut-off scraps of foam insulation from a large building that was insulated here in Fairfield. Typically after spray foam insulation is applied, it is trimmed and the excess foam is carved off. I lucked-in and got a dozen large lawn/leaf bags filled with foam insulation scraps. Sustainability Score!

The Wall Panels get Delivered!


We finally had a day where I could get enough volunteers and cool weather to move the wall panels. I have to say that that my fellow students at MUM are AWESOME. (Thank you guys!) We took all four wall panels over in one load via Mark's  flatbed trailer. (Thank you Mark!)

When we arrived at the Tiny House site only four of us were there and we had to unload the panels ourselves. We very quickly learned to utilize the balance point of the panels to our advantage easing them down onto the ground then flipping them over the remainder of the way.

At one point we had a runaway truck and trailer when Mark left the cab and forgot to put the emergency brake on... I've never seen Mark move so quickly :-)


The last panel for the North wall was the heaviest so we just slid it a couple feet off the back then Mark jumped in his truck and floored it. The panel quickly bumped off the back of the trailer and we were done for the day.

Lots of Changes

The reason I started blogging about my Tiny House experiences is because of my strong belief in community, sustainability, and permaculture. The last couple weeks I have been busy working on all fronts!

Fairfield Tiny House Communities
 
While the popularity of tiny houses is expanding throughout the US, the sense of TH Community building is not quite there yet, except in Fairfield Iowa that is! In Fairfield there are probably well over 30 tiny houses and many of them, I am happy to report, are part of miniature Tiny House Communities.

There is Prairie Song Farm (a.k.a. The Farm) a few miles North of Fairfield's center that has approximately 5-7 tiny structures. My friend Jason lives there and is building a really cool tiny dome-like structure. Even though he is in a separate tiny house community than mine, I spent some time helping move the hay bails into place earlier this week. All of the Tiny Houses that I am aware of at The Farm are off-grid (Sustainability... score!)


TVV redo 2
Of course there is SoFair Farms where my friend Tom Greene is building a TH Community. I believe there are 2-4 tiny houses currently in his community with plans for 2-4 more. Earlier this Spring I helped Tom with reclaiming some great old barn boards to be used in building one of SoFair's tiny houses. I am not certain what the off-grid energy plan is, or even if there is one. However, the Farm is being designed with many permaculture principles in mind. (Permaculture... score!)

 
A must visit in Fairfield is Abundance EcoVillage. Although their square footage does not qualify as "Tiny Houses" with a starting size of 500 sq. ft., the community itself is advanced and well established. The EcoVillage is completely off-grid with both solar and wind energy.  (Sustainability... score!) They have community and individual gardens, a swimming hole with a little beach, a recycling and waste program, walking paths and much more. Their location is within a couple miles of down town so their residents have the option of biking to accomplish many of their needs if they so desire. (More Sustainability... score!)
 
 
The Sustainable Living Coalition, a non-profit near the EcoVillage is also home to a few tiny houses. Currently there is a yurt, a 10'x10' tiny house, and a couple other tiny structures. I believe all of these tiny houses are off grid and their residents bring in the own water or do rain water catchment. (Sustainability and Permaculture.... score!)
 
The Hap Center (which is not really the name of the property) is a wonderful little plot of land near Abundance EcoVillage. There are currently four tiny houses, three of which are completely off-grid. (Sustainability.... score!) They also have a 4 season mini-greenhouse and an outdoor kitchen with a cob oven! All but one of the tiny houses at Hap's place has their own indoor kitchens, but as many of you TH dwellers know, in the summer cooking indoors can heat up your TH pretty fast! So an outdoor community kitchen for 3-season cooking is a fabulous idea. (Permaculture... score!)

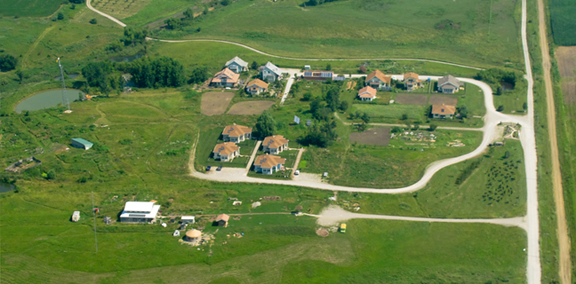
My new community where my TH is going to reside currently has 4 Tiny Houses on-site at various stages of development. The largest is a beautiful hay bail and earth plaster home. At right around 500 sq. ft. they do not qualify as a Tiny House, but the remainder of the abodes on the 25+ acre farm are definitely tiny. All of the structures on the property are off-grid (Sustainability... score!)

Monday, September 2, 2013

The Tiny House Transition Plan

While we wait for the wall panels to join up with the floor panel we are making some physical and mental adjustments to get ready for our move.
 
The house that we are currently in is approximately 1100 sq. ft.. With our tiny house coming in at 240 sq. ft. we did not want to move in and have a unpleasant transition into a MUCH smaller space. Even if we add the loft space at the TH as square footage (3 lofts, 1@6'x8x and 2@6'x6') we are still at a small 360 sq. ft.
 
So, in anticipation for our move in a week or two, the three of us decided to temporarily move into  one of the bedrooms in our current house. The bedroom we moved into is approximately 10'x10' for a total of 100 sq. ft. We are using this room for all of our sleeping and daily activities except cooking and bathroom needs. We are thinking that this will enable us to feel like we have moved into a larger space when we move into the TH in a couple weeks. I can definitely feel the squeeze... especially when it comes to privacy and aligning routine schedules.
 
I'm wondering if any other TH goers have tried some similar strategies to assist with a smooth adaption into a TH.
 
One more thing to add that I am very excited about... I just began my Fall Semester of my senior year at Maharashi University of Management majoring in Sustainable Living. The course that I began today is 'Energy and Sustainability.' Not only does it look like it is going to cover a lot of awesome materials, in the afternoons we have hands on with a Sustainable Energy Project of our choice. One of the options is installing solar panels at a tiny house is Fairfield. Come to find out it will be at one of our new neighbors house out at the farm where we are setting up our TH.
 
Other fun options include making a solar phone charger, building a small wind turbine, and Massive Scale Solar Array Project development, just to name a few. I'm very much looking forward to taking this class instructed by Lonnie Gamble, a sustainable energy pioneer and creative guru originally from my home State of Maine. Whoop... Whoop.
 
Here's to a great month of learning about energy systems, some of which I hope to implement in our own TH!

Monday, August 26, 2013

The Floor Joists


The past couple of days have been spent on the floor joists panel. The panel has been sitting upside down on blocks over the past several weeks. Since we are building "inside-out" the bottom of the floor panel has been facing up so it needed to get flipped to be stuffed.
 
Friday we flipped it over so I could get ready to stuff insulation between the joists which would be followed by installing the subfloor which will be 3/4" untreated plywood. There were only 8 of us and once we got the floor panel up on its side we realized that the panel would probably slip when easing back over. Luckily there was a back-hoe working on the library nearby so we talked them into helping us complete the floor panel flip. It was very exciting.

Saturday I spent the morning with Henry un-packing recycled insulation from the North Shed's attic. We took a couple trips and took the 15 bags of foam insulation scrapes over to the floor joists panel which spent the summer at MUM's Sustainable Living building.
Sunday morning Mark (one of my Sustainable Living Instructors from Maharishi University of Management) and I loaded the 12' x 20' x 8" floor joist panel onto a trailer by ourselves and transported it over to the new TH site.


We utilized a wide array of crude lever and pulley systems to maneuver and lift the 800 lb.+ floor panel onto the trailer. We then loaded up the pre-cut roof joists/rafters along with the sub-floor plywood and headed over to the building site where there were 3 other sets of hands waiting to assist us in unloading and placing the floor panel on the leveled concrete foundation blocks.
 
Once Mark and I took some time to review the foundation system that was created earlier in the week, we decided that the pilings really needed to be moved out to the four corners opposed to the original 28" insets. So within the next couple days I will head over to Ottumwa to grab 26 more cement blocks that we will use to support the four corners of the tiny house. The left over blocks I will use to level the south facing deck.
 
This weekend I also hit a few yard sales looking for small and recycled furniture. I found a 7"x7"x4' cd case with 8 little cubbies that I will use bedside in the master loft for alarm clock, tissues, books, iPhone, notebook, and ear pods. I also found a metal strainer, some twin sheets, couple hand towels, a beautiful hand made quilt, an ottoman with storage that can also be used as a nice cushioned stool to sit upon, and finally a small half circle wall table that I'll place in the front entry for keys etc.. A great find this weekend for only $15 total. A special thank you to my friend Mark who gave me a great deal on the CD stand as a Tiny House warning present!

Thursday, August 22, 2013

A Foundation

The past couple of days I have been working on the foundation. After selecting the general site over the weekend, I walked the area and staked out the four corners of Heather's Tiny House. There are many factors to consider when selecting a final location and placement for a Tiny House. These were the Top 6 Factors, in my order of priority, for my selection process. 

Top 6 Location Considerations for a Tiny House
1. Energy Flow of the Land
2. Passive Solar Gain
3. Winter Storm & Wind Protection
4. View
5. Land Topography
6. Property Lines Set-Backs and Easements


Taking all of these factors into consideration I staked out a south-facing location which was bordered by trees in the Northwest corner.
 
The next step was taking landscaping cloth and covering the area where the stakes had been placed. This would provide a "clean" area from which to lay the foundation blocks and also retard an growth coming up from underneath the TH once it was in place.
 
Today we took three hours and set up and leveled the blocks that the TH will be set on this coming Sunday. We first took a fine limestone sand/small stone by-product to make a smooth level surface in which to place each of the pillar blocks.


The next step was to level each of the pillars so the TH would be level. Our Northeaster corner was the highest and the Southwestern corner was the lowest with a 16" difference between the two.
 
 
We had a lot of fun hauling out the limestone sand to the site and getting everything all level and then finally squared. Ironically when we first starting paying the blocks we did not have a level with us. So we came up with the brilliant idea of utilizing our water bottles as levels. We were able to completely level the blocks in place by using our water bottles alone.
 
 When it came to leveling each of the posts with each other the electromagnetic level came in really handy. It was a great idea to have our dog Buddy managing the process. He really kept things going smoothly!
 
Tomorrow or Saturday I will be sinking the wind strap anchors into the ground and get them in place for when we bring the floor and wall panels out to the site on Sunday. It is going to be a very exciting week!